Framing Square | Rafter Square | Terms | Related Tools | STEM | References | back
The square as a building tool dates back many centuries. It is illustrated in English wood-cuts from the 16th century. Wooden versions were used to layout the Egyptian pyramids. The modern framing (steel) square was patented in the U.S. by in 1819 by Silas Hawes, a blacksmith from South Shaftsbury, Vermont. Rafter squares (also called a speed or triangle square) were invented by Albert J. Swanson in 1925 as a carpenter's layout tool. He later founded the Swanson Tool Company to mass produce his invention.
Both tools provide a right angle and can determine angles for roof framing but have different utility. The rafter square is the simpler tool that is smaller and easily carried in a carpenter's nail bag. It also makes an excellent saw guide for cutting square cuts on lumber less than 6" wide. The framing square is a more versatile tool that can be used to layout stairs, rafters, determine board feet, and layout octagon (8 sided) shapes (ex. a post).
|
|
|
| Framing Square | Rafter Square |
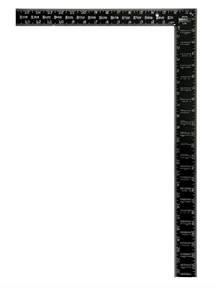
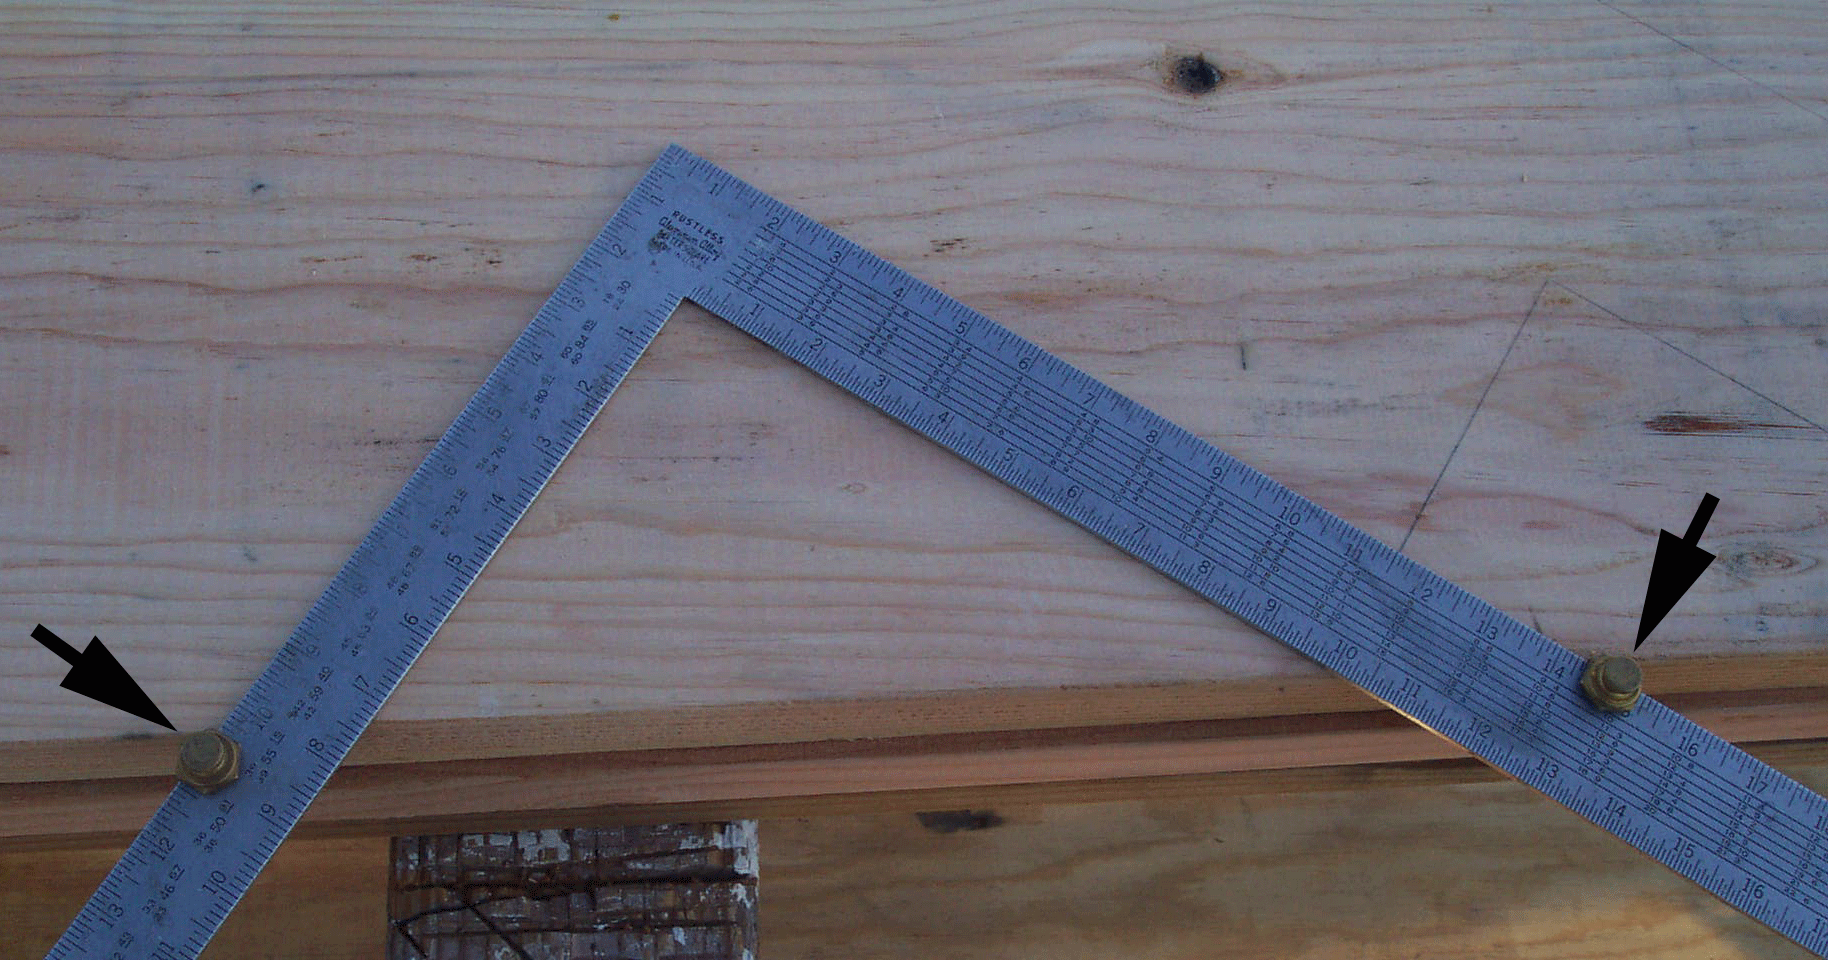
The modern framing square is right angle with a 2" "body" and a 1 1/2" "tongue". The body is 24" long and the tongue is 16" long. A good quality framing square has the following tables stamped on the square:
Note that not all squares have all the tables. Trivia:Some squares have a hole on the tongue near 3 1/2". When hung on a wall using this hole the square will hang straight.
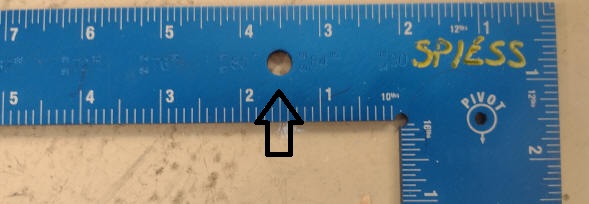
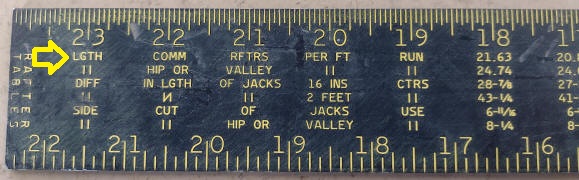
Hanging Hole
This table found on the body of the square is likely named for Jeremiah Essex an early manufacturer of steel squares. The table will determine the board feet (bf) of 1" thick board. To determine the board feet of a piece of lumber you start with the numbers under the 12" mark. These are the length of the board (by definition a board foot is 1" thick x 12" wide x 1' long so these numbers also represent the bf of a 1 x 12. From the 12" column choose the row that indicates the length of your board. Now choose a column that is the width of your board. The number at the intersection of the column and row (length) is the bf of a 1" think board. If the board is a 2 by then double the number. You can do this type of adjustment for length as well. For example if you have a 2 x 6 x 16 then you would take the number under 6" and the 8' row (4-0) double it for the 2" thickness and double again for the 16' length (16 bf).

Located on the tongue of the square this table is simply the length to cut a 45o brace given the length of the side. The two small numbers are the side length. The large number is the brace length. For example to cut a brace for 36" side you would layout a length of 50.91 inches. This is the LONG side of the brace. Some squares have 100th scale. To use the 100th scale find the decimal value (in this case .91) on the 100th scale then read to the closest 16th inch. Since these braces are a 45o on the ends. Layout the 45o angle using the square and any convenient pair of inch measurements (ex. 10 and 10). The angle must taper toward the middle.
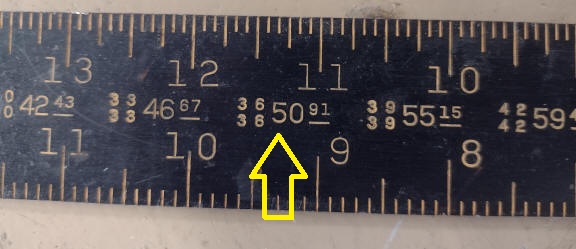
Brace Table
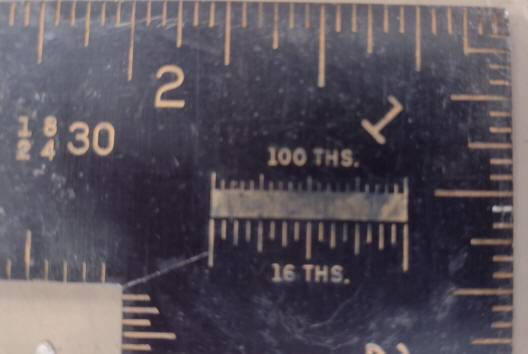
100th Scale (Not found on all squares)
This scale is found on the tongue and is used to determine the side length of an octagon. Start with a square shape. Measure the side of the square. Read this length on the scale. Then read the corresponding distance (inches) on the square. For example if the side of the square is 12" the reading would be 4 1/2". This is 1/2 of the side length of the octagon. To layout find the center of each side and then measure toward the corner from that mark using the reading and mark that point. Finally connect the marks to finish the octagon shape. Note that larger octagons can be constructed by using multiples. For example if you want to form an octagon slab that will be 8' (96") across. Read 48" on the scale and double the reading (12").
A common rafter on a gable roof spans 1/2 of the building width.

Finished Layout. Top of the rafter is down. In this example
the slope is 6/12, the total run is 3' and the tail is 6".
A shed roof simply spans the two outside walls. The difference in wall height determines the slope. A shed roof rafter has two bird's mouths.
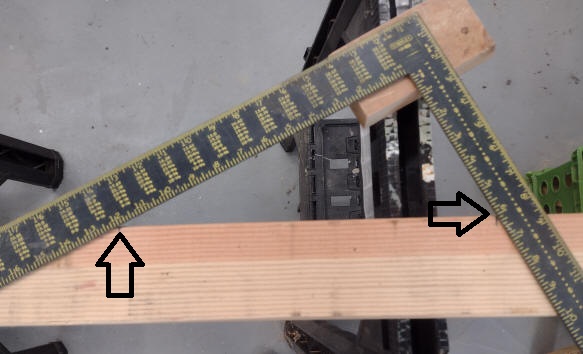
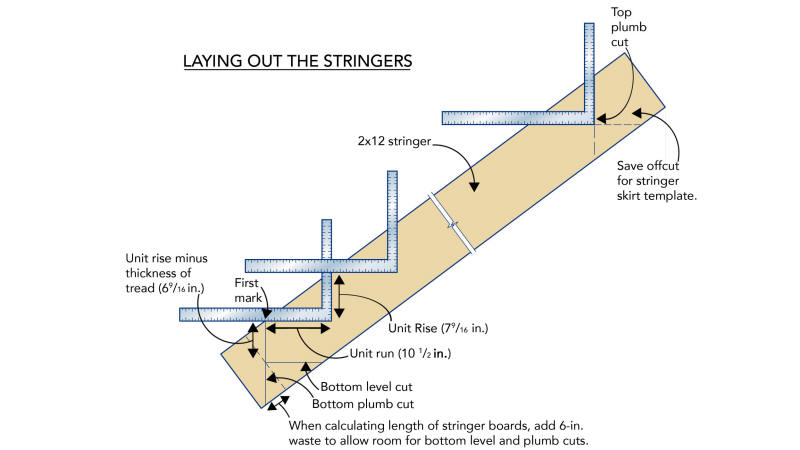
Stair jacks support the stairs and typically 2 or three are used for normal width stairs. They are easily laid out using the square.
From: https://xiiowt.unveriumenflue.com
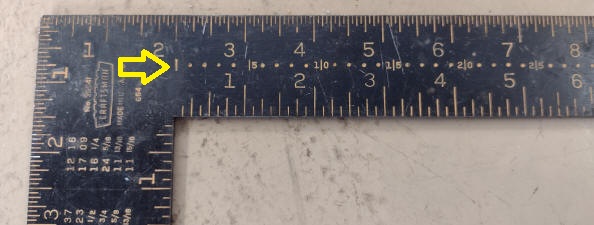
The center of a can easily be determined with a framing square.
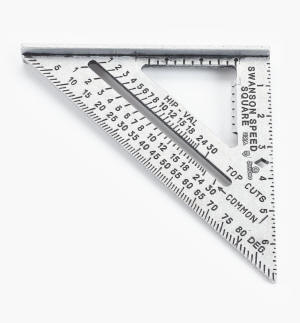
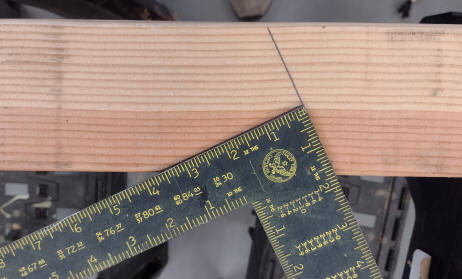
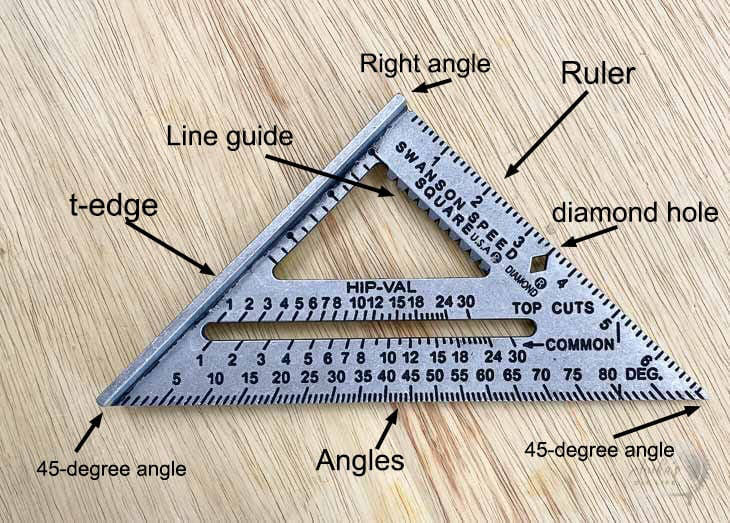
The rafter square is a flat triangular square with a T stop on one leg.
From: https://www.anikasdiylife.com/speed-square-beginners-guide/
The rafter square can be used to determine the angle of the plumb cuts. Place the pivot on the edge of the board. Pivot the square until the rise is aligned with the number on the square. For example if the rise/run is 6/12 and you want the angle for a common rafter then align the edge with the 6 on the common scale. Note: You can also use the square to determine the angle of the plumb cut by aligning the square then reading the angle scale at the edge of the board. This is useful in setting a miter saw angle for repetitive cuts.
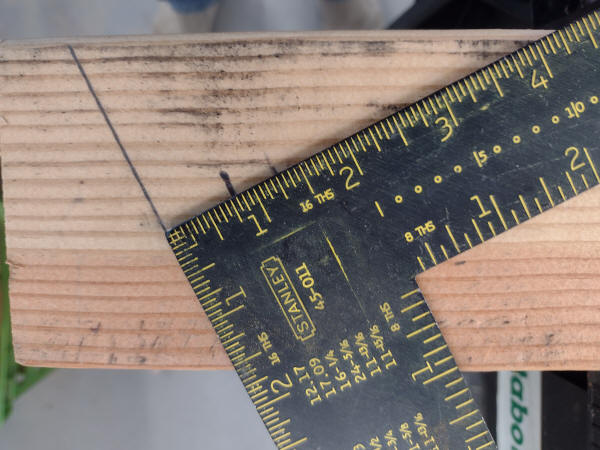
Square is positioned for 4/12 slope of a common rafter. The plumb cut is
the angle on the right side of the square.
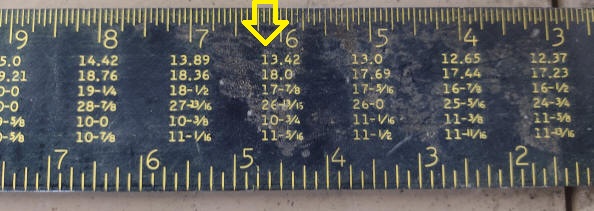
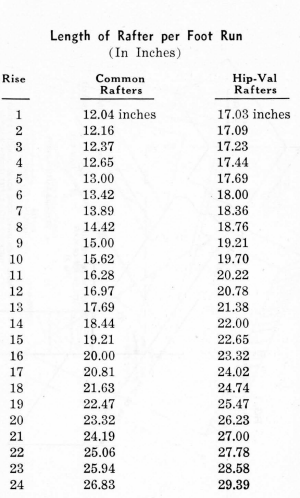
The rafter square cannot be used to determine the length of a rafter. Most rafter scales come with a table like the one shown below. Find the rise in the table then multiply the number buy the run. For example for a common rafter the rise/run is 6/12 and the total run is 12' then the length would be 13.42 x 12' = 161.04". The same calculation can be used to calculate the tail length.
The rafter square has a built in 45o angle. To mark another angle (< 45o) place the pivot against the edge of the board and rotate the square until the edge of the board is aligned with the degree marking on the outer edge of the square.
Square is set to 25o angle. The angle is marked on the right side of the
square.
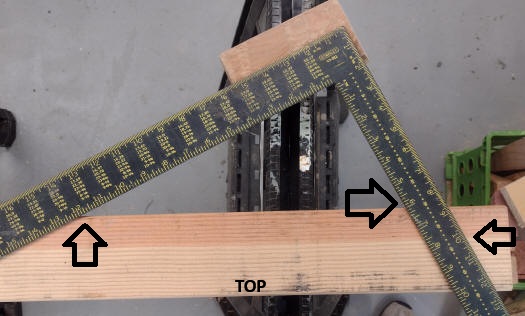
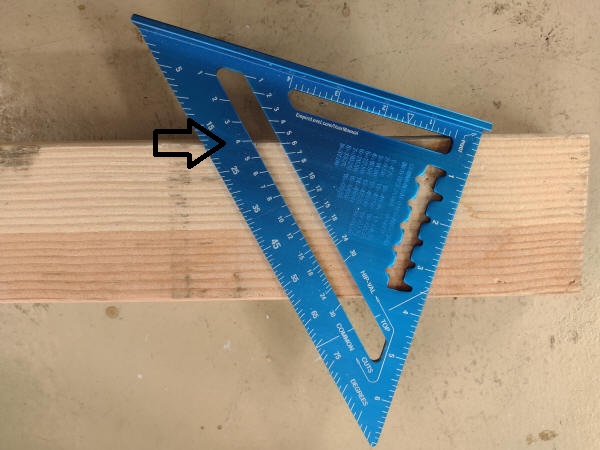
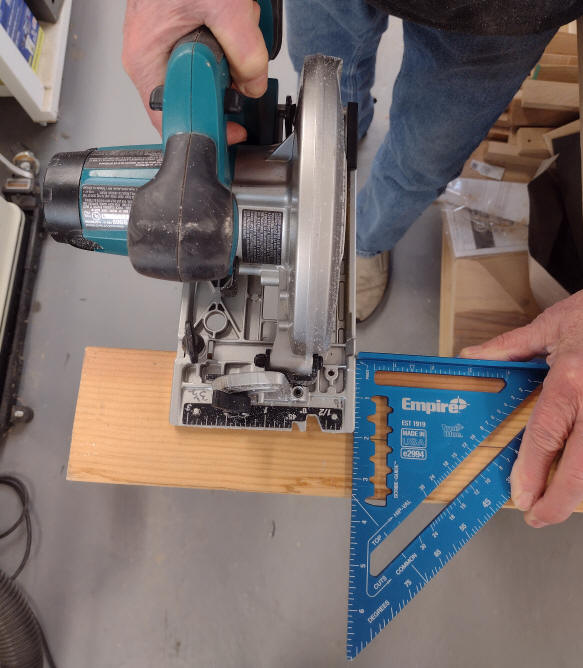
By placing the T edge of the square against the edge of the board the other leg can be used to guide a circular saw to make a clean straight cut. Hint. Mark the edge of the board to be cut then align the saw blade with the mark and move the square against the saw base plate.
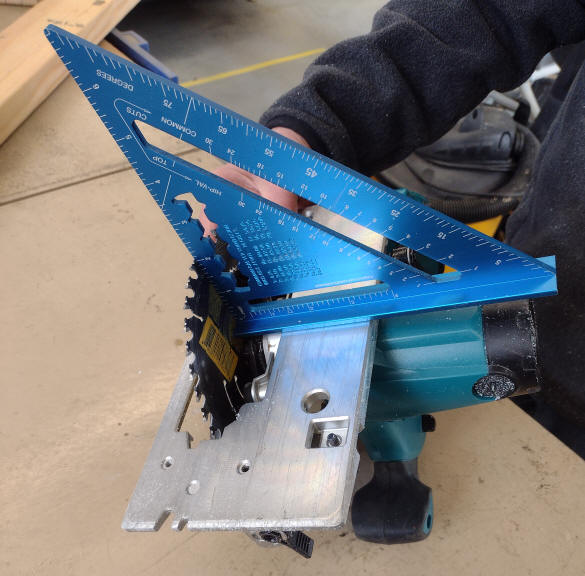
The rafter square is an ideal square to check the blade for square on a circular saw or table saw. It is recommended that you check a circular saw every time the angle is changed. Simply place the square against the base plate and blade (between the teeth)
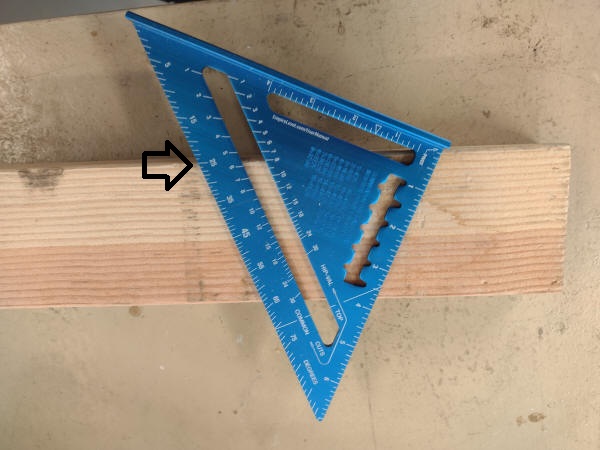
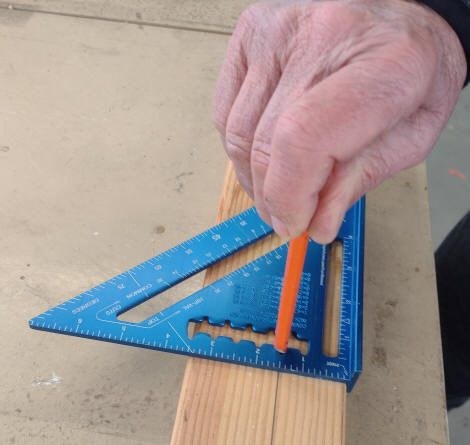
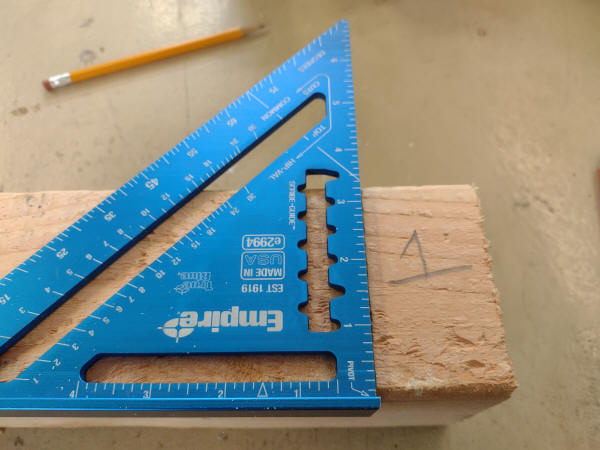
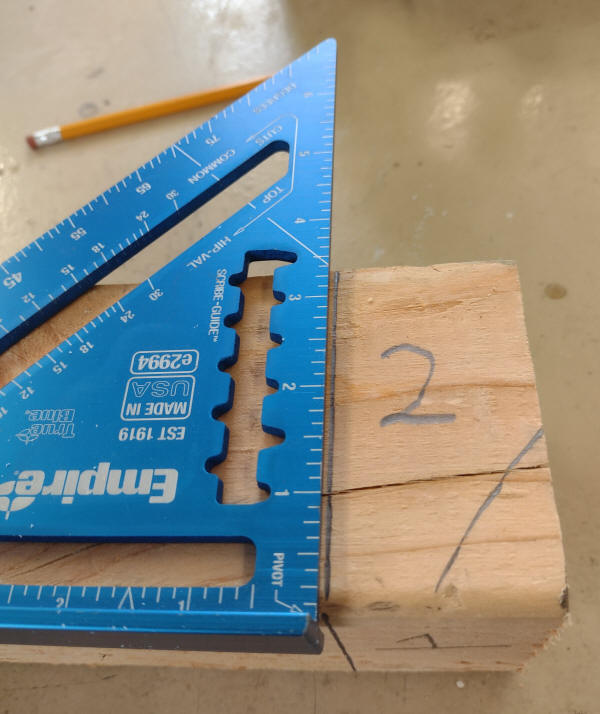
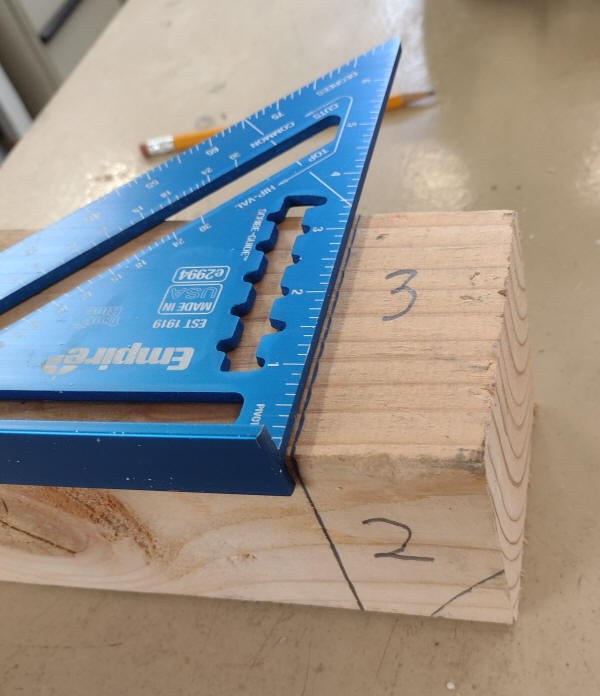
Some rafter squares have groves in the inner part of the square. To mark a thin strip on a board place square tightly against the board and place a pencil in the appropriate groove. Now slide the square along the board to make a line parallel to the edge of the board. Pushing the pencil is best.
To cut a board that is thicker than a circular saw will cut you need to mark both sides of the board. The rafter square makes quick work of this task.
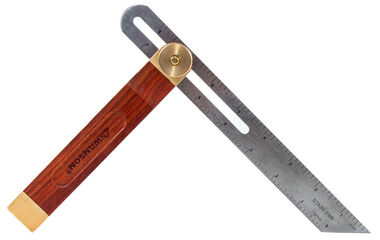
Once the angle is determined using square a sliding T bevel can be used to quickly reproduce the angle.
Stair gauges are attached to a square like a fence to allow quick reproduction of the angle. They can be used on framing squares and rafter squares.
The following terms are used to describe the framing square and common building framing.
|
Bird's Mouth |
The notch cut in the rafter to fit on the
supporting wall. It consists of a plumb cut and a seat
cut. The depth of the seat cut is commonly the width of
the supporting wall, but the notch should not exceed 1/3-1/2 of the
rafter width as it will weaken the tail (overhang). |
|
Board Foot |
A unit of lumber volume defined as 1" x 1' x
1'. Bulk lumber is often sold by the board foot (bf). |
|
Body |
The thicker part of the framing square
(commonly 2"). |
|
Brace |
A support placed between to framing members. |
|
Gable Roof |
A simple roof that has the high point in the
middle of the building. |
|
Hip Roof |
A gable roof where the ends slope to the
outside wall of the building |
|
Joist |
A framing member that supports a floor or
ceiling |
|
Pitch |
The rise of the roof over the span of the
building. (Note rise/run or slope may be called the "pitch" which is
confusing.) |
|
Plumb Cut |
The angle cut on the end of the rafter that
will be vertical (plumb) when the rafter is installed. |
|
Rafter |
A framing member that supports the roof. |
|
Rise |
The vertical measure of stair tread or rafter
slope |
|
Run |
The horizontal measure of stair tread or rafter
slope. |
|
Seat Cut |
The angle cut on the end of the rafter that
will be horizontal when the rafter is installed.
Commonly used join with the supporting wall or accept a soffit.
Seat cuts are at a right angle to the plumb cut. |
|
Shed Roof |
A roof were the high point is an outside wall
and the low point is is the opposite wall. |
|
Slope |
The roof rise divided by the run of the rafter
commonly referred to as inches per foot of run. Ex. 6/12
or 4/12 |
|
Stair Jack |
The framing member that supports stairs also
called "stringers". |
|
Tail |
The part of a rafter that overhangs the wall |
|
Tongue |
The narrower part of the square (commonly 1-1/2") |
|
Truss |
An engineered and manufactured framing member
that combines a rafter and joist. |
Their is a good deal of math behind the tasks listed above. In some cases the square itself removes the need for math as in the determination of slope distance. However there is still many opportunities to introduce and practice common problems in carpentry using math.
Worksheet
ABC of the Steel Square and its Uses (an historical reference published in 1908)